Sunday, June 24, 2007

Plays with Dogs


Jess left today, but not after a parting photo shoot with Bella & Hannah. I think Hannah wanted to leave with her. Jess and Hannah have always had a special bond, ever since Jess let Hannah sleep with her when she was a wee pup of only 6 or 7 weeks old. She still gets crazy excited when Jess comes for a visit and is always a bit sad when she leaves.

Check out the gorgeous necklace Jess is wearing! We went to a bead shop and she chose the lovely stones for her necklace. I taught her how to put it all together...and then I taught her how to string pearls. She's always been such a good student. :)

Tuesday, June 19, 2007

Summertime, continued...

Once the frame was formed, the next task was to either solder or fuse it to the thin metal sheet (33 gauge). I chose to solder.


Jean then taught me how to twist wire by hand, which is far easier to control than when twisting in a flex shaft. I carefully laid the wire around the form and soldered. It was finally time to begin placing the enamel into the cells. The fun part begins!


I had tried a lot of different combinations of red transparent enamel, ruby transparent enamel and flux, and chose this color as my favorite. I also added some blue for contrast. Once I had fired on about 4 or 5 coats of enamel into the cells, it was time to sand (yucky part). When I was finished, we gold plated it in 24 karat gold. This is how it all came out:


As soon as I returned home, I ordered more enamels and cannot wait to get started on another project. It's an entirely different medium to work in and I'm lovin' it (except for the sanding part). I can't wait to return to Wildacres next year!

Wednesday, June 13, 2007

Hot Fun in the Summertime

Here I am up in Wildacres in Little Switzerland, North Carolina...just a short drive from Asheville, NC. On the left is a photo of some of the pieces my teacher, Jean Stark, has done in the past, and what we are trying to duplicate in this class by using fine silver and enamels.

This place is heavenly. The mornings and evenings are cool and the days are pleasantly warm. We wake up to a bell ringing somewhere on the grounds at 7:30. Breakfast is served family style between 8 and 9:00. Everyone then heads off to their workshops. We have an engraving class going on, a writer's workshop (science fiction writers), a form-folding workshop with John Cogswell, Intarsia, Wax Forming and even a beginning metalsmithing class. We work until the bell rings to let us know it's time to head to the dining area for lunch at noon. Then we're back to work until the dinner bell rings. After dinner, we usually go BACK to our studios and are free to work until 10:00 pm, which we all do! We're loving it. No phones ringing, no television, no interruptions. In fact, to get phone coverage, I have to walk into the woods and find a place where my phone suddenly picks up a Cingular signal and I can't budge from that spot to call home.


The pic on the left is my "sample" of different kinds of red that I made. The pic on the right is the beginning form of what I am beginning to make in this class. I am learning SO MUCH and really loving it here. Just hanging out with all these people who love doing the same thing I do is a great experience. And I got super lucky with my roommate! She's from Michigan and I couldn't ask for a nicer person to room with. Here are a couple of my classmates - Robert (Rowbear) and Karen.


More later! I'll be home soon and will show you the finished piece as soon as I can.

Monday, May 21, 2007

The Matrix Opal

Here is my recently finished earthy-looking pendant and chain I had started ohhhhh soooo very long ago. The lower stone was purchased when I first began metalsmithing and now I can't remember what it's called, but I think it's a form of jasper. I made the bezel (which is textured, but you can't see it in this photo), and then put the whole thing aside for a couple of years. Recently I purchased the upper stone, which is called a Matrix Opal (from Mexico), and did not realize what a perfect match it was with the bottom stone until I brought it home and placed it in my collection of stones. I wish you could see the iridescent quality of the Mexical Opal - it looks like an alien eyeball.

I don't know if I've mentioned this before, but if you have an interest in making handmade chains, I highly recommend Jean Stark's book called "Classical Loop in Loop Chains." You would definitely have to know some basic metalsmithing skills...like how to use a torch, how to fuse silver, etc, before you begin.

I have to miss my last two classes with Julia Woodman because of a trip back home (need to visit the folks), and I will truly miss her and my friends in the class. I believe it is helpful to be among one's peers...people who enjoy doing the same things you enjoy...to help spur one's creative juices in whatever area one is interested in. Sometimes taking a few months off can be good, as well. Either way, it's all good.

Friday, March 23, 2007

Shiny Toys


Ta-Daaaaaa! My copper bowl is finished. Okay, you're probably saying, "So what?" Well, if this was as big as my round copper stew pot from William's Sonoma, you would surely be impressed. But we all have to start somewhere, right?

It's hard to believe this little bowl (which is holding dog treats now on the kitchen counter) took so long to make. It started from a flat sheet of copper. With all the hammering on that innocent piece of metal, I thought I'd kill it...or at least form a hole in it with all the banging necessary to make a bowl shape. But it just kept on changing and warping as I went along. Once the bowl was formed into the shape I was happy with, I continued to finish with a forging hammer over and over and over, around and around and around, until it was as smooth as it can possibly be. Phew! I hope I have some new muscles from this. :)

In the pendant below (more forging and forming), I used what I learned in the John Cogswell workshop to form it. It's rather plain and simplistic, but the twist in the metal gives it a little personality. It also holds my sunglasses quite nicely. :)


Saturday, February 24, 2007

Hammer Time

I just spent a great week in a John Cogswell Forging Workshop. John is one of the nicest and most knowledgeable teachers I've ever had. He was open for every question (no matter how silly) and treated each person there with respect and encouragement. For five days, we learned how to stretch and form metal with a hammer and an anvil. He taught us how metal moves and what we need to do to make it move the way we want it to. Easier said than done! Well, it was easy for John, but a challenge for the rest of us. Here he is demonstrating for a couple of ladies in the class.


This copper necklace was our second class project. John whipped this one out from a piece of round copper wire in about an hour. It took the rest of us an entire day...some of us it took two days.


This is how people keep their forging hammers safe from getting marked up accidentally. Hmmmm...could this be Jessica's next knitting project? Hammer socks?


If anyone reading this has an opportunity to take one of John's workshops, don't hesitate. He's excellent.

Monday, January 22, 2007

Haaaaang on Loopy, loopy hang on

This past week I decided to make a chain I had never attempted before for a pendant I recently started. Because I'm supposed to be writing an article for a jewelry magazine in the next few months with photographs of each step, I decided to do a photographic practice session while making this chain. This has enabled me to see where the photographs are going to need more light, better backgrounds, etc. Meanwhile, I'll share with you all how I made the chain, just in case anyone out there might be interested in making one.

I used 14 gauge fine silver round wire and first wrapped it around an approximately 8 mm circular metal cylinder (wood would work just as well), then gently slipped off the loops while holding them tightly. The loops were cut with Joyce Chen Scissors (these are made for cutting chickens, but they're excellent for cutting metal). I cut 20 total (10 for each side).


I closed the loops so the ends were touching and fused them shut before putting them through the rolling mill to flatten just a bit.


The next step was texturing these 20 loops. I took a tool with a straight edge and pounded lines all the way around each loop, both on the front and the back.


Continuing along, I made 22 more loops (11 for each side of the chain) out of the fine silver (same size), but left these smooth. I opened one, slipped on two textured loops, then soldered the smooth one closed (the reason I decided to use an easy solder to close these loops is because I was losing too many loops by trying to fuse them). I then added a smooth one to the last textured loop, added one textured loop to that and soldered it closed, and so on, until the chain was complete. Each side ended up with 11 smooth loops and 10 textured loops.


At this point I was able to attached the ends of the two sides of the chain to the two sides of the pendant. I added a handmade toggle clasp, and then plopped the whole thing in a glass of JAX to darken and make it look "older." The very last thing I did was set the two stones made from Pietersite, and polished it up with a bit of ZAM.


I would have been glad to have given you a tutorial on making this bezel, but had already made this piece when the idea came to me to photograph the steps. Perhaps next time...

Thursday, January 11, 2007

Silver and Opals and Chains, Oh My!

I'm happy to report I found some filigree solder online, so here is the result from my first experiments with the new concoction . It worked quite well, but it's different from the handmade solder I learned to cook up previously using silver, copper, bronze and zinc. Far less of the purchased solder is needed to fuse the filigree to the frame, so I overloaded it every so often, but it burned away nicely.

I am in love with this stone. I purchased it from our friendly "Opal Guy" (Gene) who mines the opals in Australia and brings them to our school for us to choose from. When he shows up and lays all all of his gorgeous stones on the table, no one can get any work done. We obviously buy a substantial amount from him because he keeps coming back...and that's a good thing!

Now I need to get to work on my copper bowl. In the new class I started this week, we are learning how to turn a flat piece of metal (copper first, then sterling silver) and pound it, little by little, into the shape of a bowl. The teacher, Julia Woodman, is wonderful. She's kindhearted, patient and considerate. I can tell already I am going to thorougly enjoy learning from her.

Thursday, January 04, 2007

You Can Leave Your Mittens On


What was my absolutely most favorite Christmas present of all this year? My new mittens lovingly knitted by my daughter, Jess, otherwise known as Yarnmonster. Aren't they great? She also made her brother a pair of black socks with the scull and cross bones design on each one in white (he's a pirate at heart), and whipped her dad up a gorgeous soft, green scarf! I'm amazed by her knitting ability. I look at the intricate designs and really have no idea how she does it.

Now all we need is a little cold weather over here so I can wear them! :)

Sunday, December 10, 2006

Oh Come all Ye Bookworms


My book club friends LOVED their sterling silver bookmarks, by the way. I had placed them in their napkins so they found them as they sat down to a dinner of "Almost No Chopping Black Bean and Salsa Soup," accompanied by a salad with butter lettuce, avocado, fresh spices and gluten free cornbread. What a wonderful evening. We sat and talked about anything and everything under the sun (except for books, of course, since this was the one time of year we allow ourselves to simply have a party and not be serious about a book). We'll discuss "Thirteen Moons" by Charles Frazier next month, but it does seem everyone is enjoying it.


My somewhat new neighborhood had a girl-gathering as well. I've been here around four years, but it's only recently that we've all started getting to know each other. This was called the "First Annual Ornament Exchange." Wow! Lots of women drinking champagne and having a happy good time.


Wishing you all a very Merry Christmas in case I'm not back with another post before the first of January! Enjoy the holidays!

:)

Monday, November 13, 2006

All Tied Up in Celtic Knots


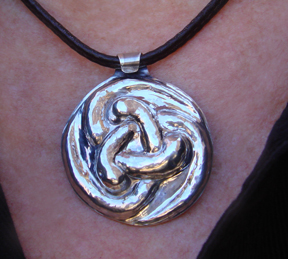
I am skipping my last Repousse class this evening because I have finished the two projects I started in that class and need a short break from all the pounding. It can be a bit rough on the neck and shoulder if one doesn't sit properly, something I need to work on. I do enjoy it, though, and find it somewhat meditative. Time flies by quickly as I sit in front of my bowl of red pitch, tapping away until the desired height and shape is achieved. Above is the celtic knot design, the first thing I made in class. Below is the bracelet, project #2.


I have learned a lot from doing this cuff bracelet. I discovered that by using 20 gauge silver, one is virtually guaranteed of never pounding hard enough to cut through the metal, but it does require a heavy hand to make the impressions. I realized too late that the tool I was using to line everything was too thick. Next time I'll know better.

When it was completely done, I formed it into a bracelet on a bracelet mandrel. Then I polished it up and it's now on my arm as I type! :) Next time I'll try doing another cuff bracelet with more variations of height in the design.

Thursday, November 09, 2006

Can't Judge a Book by it's Cover


A few years back I decided to give all my book club friends a handmade bookmark at our December holiday gathering. If my memory serves me correctly, that first year I made embossed cards using red and green paper, rubber stamps and embossing powder. I remember Elaine saying, "I can't believe you MADE these." Little did they all know then how much much time I spend "making things."

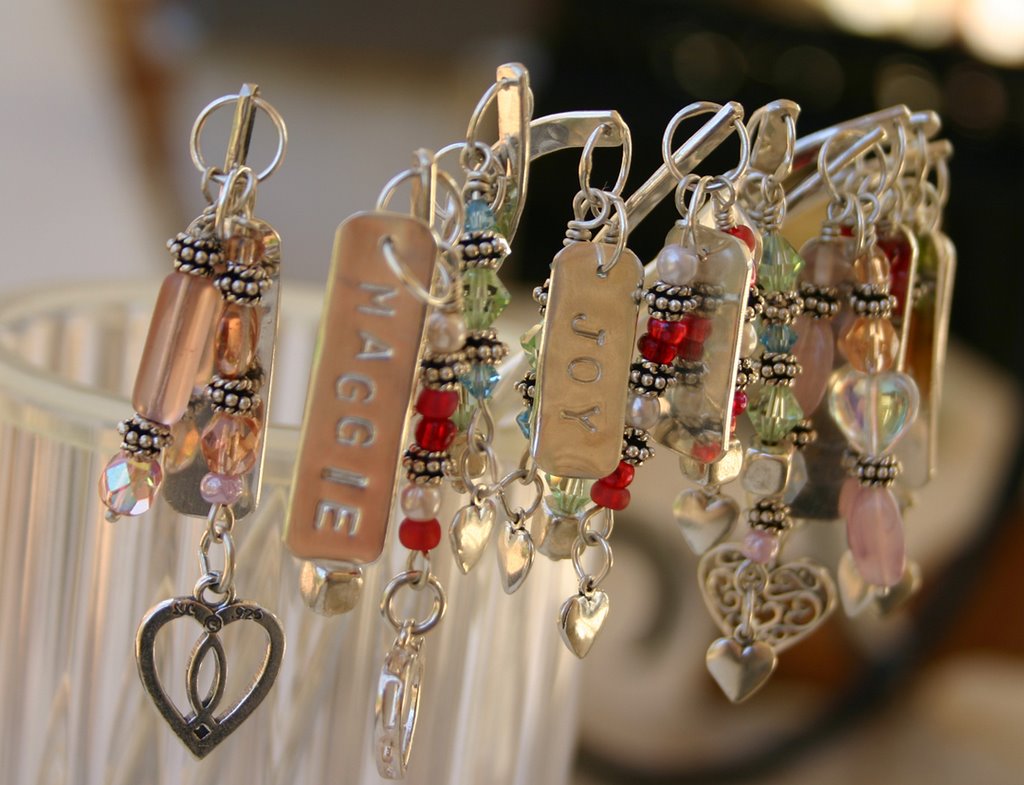
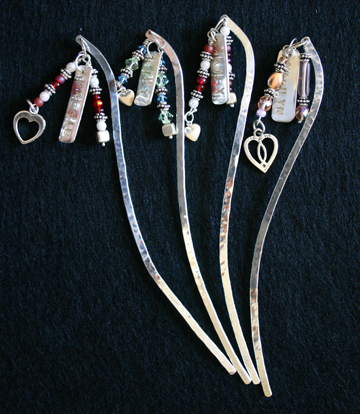
This year I decided to create sterling silver bookmarks with pretty little beads and charms dangling from the top. I added a rectangular piece of silver on which I stamped each of their names.


I'll give the instructions here in case anyone would like to make some for their friends. Basic metalsmithing tools are required.

1. Cut 10 gauge round sterling silver wire into approximately 4 or 5 inch pieces. Gently
shape into a long, stretched out "S" shape.
2. Roll each piece through a rolling mill until desired flatness is reached. Lightly file the
top and bottom to remove rough edges.
3. With a chasing hammer (round end), pound on each side of the wire, making chasing marks. (Don't forget to stamp your bookmark with a "sterling" stamp.
4. Drill a hole through the top.
5. Add a good sized jump ring and solder it closed (soldering is optional, but recommended).
6. Put them in the tumber and tumble to make shiny (about 30 minutes or more).
7. Add your beads.
8. To make name tags, simply stamp the names into 24 gauge silver and cut out with
Joyce Chen scissors or use a jeweler's saw. Flatten tag on steel block if it's warped at all. Drill a hole at top. File the edges to remove sharpness. If there are scratches in the silver, sand them out with sandpaper (First 220, then 320, then 400 and last 600 grit - coarse to fine). Tumble in tumbler about 30 minutes. Attach to bookmark with a jump ring.

I hope the girls like them. :)


Sunday, October 29, 2006

It's Howl-O-Weenie Time


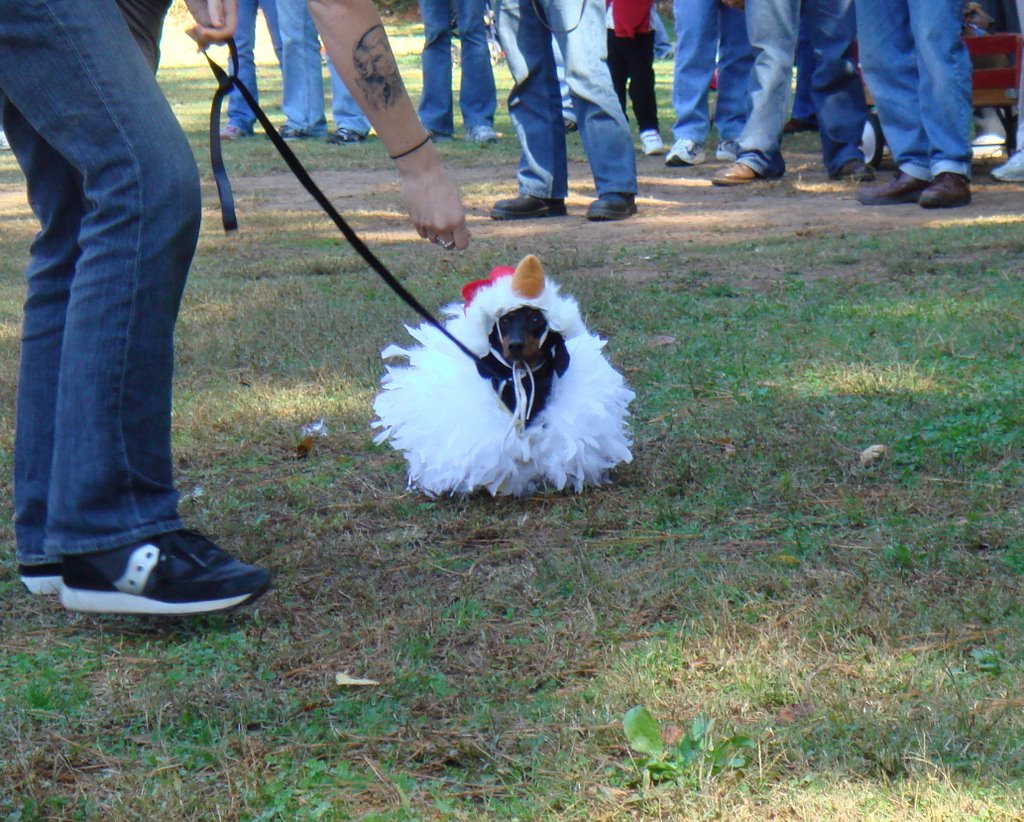
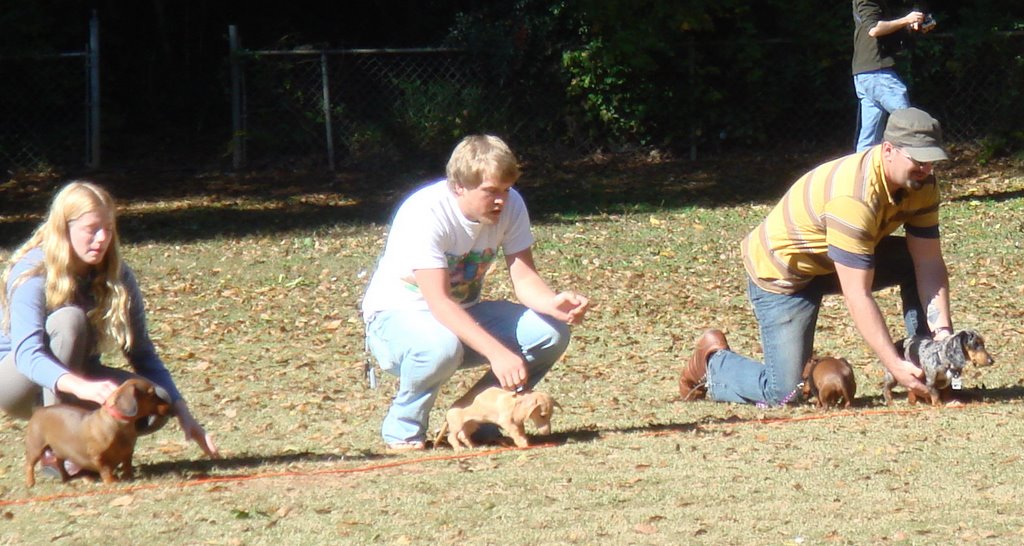
Imagine a park filled with little dachshunds in all sizes and colors on a gorgeous fall day playing games with their owners...and most of them in costume! The very first contest involved the wee ones wearing all kinds of creative attire. Here are our own little chorizo dogs, as well as the one dressed as a chicken. :)


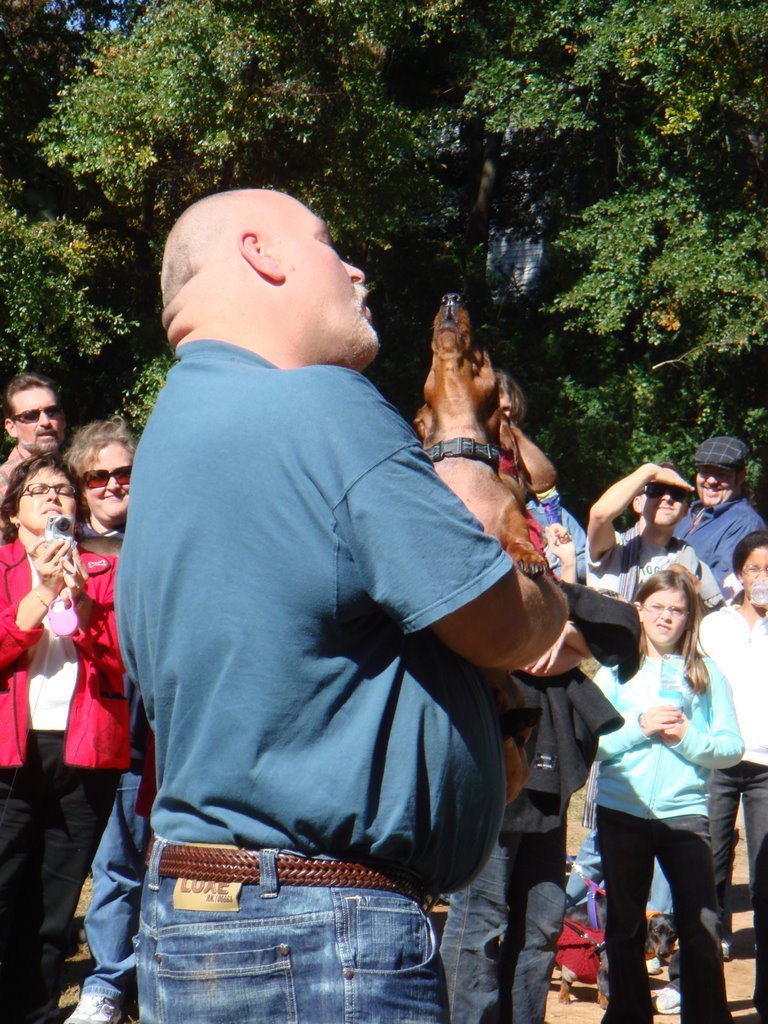
The Howling contest followed. This is Andy with his owner. Andy sang his little heart out and the crowd loved him.

There was a kissing contest (blech!) where the number of licks the pup gave it’s owner were counted in a 30-second interval. Very gross – me being never one to want doggy tongue on my face (or lips!). Then came the doggie dash. Poor Hannah was clueless about what to do and just wandered around the field. But it was such a hoot to watch!


I had never seen myself as one of those dog people who would attend such an event, but I'll now admit it was a ton of fun. Just watching these little weiner dogs in costumes kept us laughing the whole time. Especially our own. :)

Wednesday, October 11, 2006

Autumn

It's been a beautiful fall day here in Georgia. Sunny and slightly cool with a pleasant breeze blowing the first of the leaves off the trees. It's getting dark outside earlier now, as well, which I'm always ready for. It's a true toss up between fall and spring, but I think this just may be my favorite time of year. What a perfect day to try out Karina's Black Bean & Sweet Potato Enchiladas! I would have never imagined combining sweet potatoes with black beans, so it's a good thing we have people like Karina around whose creativity knows no bounds.


When I first saw this recipe posted on her blog, "Gluten Free Goddess," it looked a little complicated. But it isn't. Once you get all the ingredients together, it's actually very simple...and quite tasty! Next time I will make a bit more of the sauce, though, and add a touch more goat cheese to each enchilada. As Karina suggested, I served this alongside a green salad with some mandarin oranges, and threw some dried cranberries and nuts on the top. This is a great meal for my vegetarian daughter. Can't wait to try it out on her when she's in town. :)

Recently I've been working on a filigree pendant while taking a break from all the pounding on metal involved with Repousse. You truly need to take time off every now and then or your neck/shoulder muscles will begin to scream. Here's a sterling silver pendant with a blue Kyanite stone and a cultured freshwater pearl I just finished. Because it is so small (about the size of a quarter), I've decided to use a purchased chain (oh, such guilt!) instead of trying to make a chain that would be small enough to look right. I truly don't think anyone will mind! :)

Thursday, September 14, 2006

Eastern Repousse

Yay! A new class! I've been waiting to take Victoria's Eastern Repousse class for a good long while now. She only offers it every couple of years, so Monday night when we all gathered for our first lesson, everyone was excited to be there.

I took a 4 day session in Chasing and Repousse last fall with Valentin Yotkov. His studio is in Brooklyn, New York, but occasionally will travel to give workshops. This photo shows what I was able to accomplish in that class. It was the design given to all beginners.


It's very rough, but gives you an idea of what chasing and repousse is. Basically, a piece of metal (usually silver or copper)is placed in what is called a pitch bowl and then a design is pounded out in the metal using forming tools and a hammer. Work is done on both sides of the metal. I remember it causing a bit of neck strain, so I'll be sure to sit properly this time around.

I'm hoping to make a cuff bracelet with some kind of design on it, but that might be a bit much for a beginner. Perhaps something smaller to start would be a better plan!

:)

Monday, August 21, 2006

The Wiener Wonder Dogs

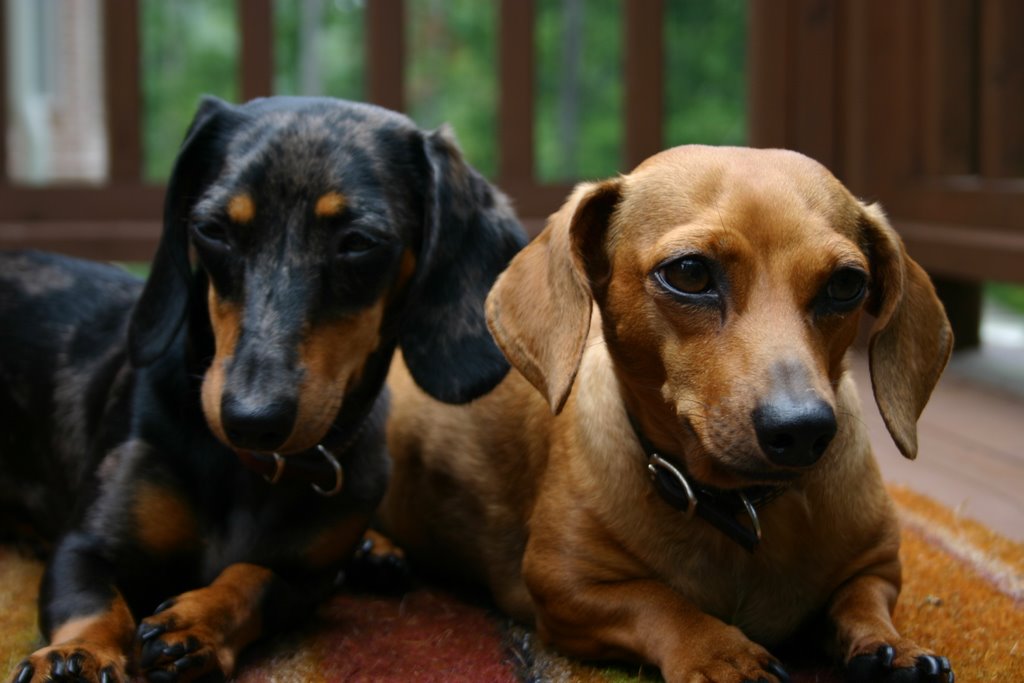
While we were off enjoying our trip in Canada, the little pups were off being trained at Atlanta Dog Trainer. They lived with a trainer, Stenelle, for 2 weeks and came back transformed! Here's a photo of them doing their "sit command:"


An added benefit of all of this training, one which I had not anticipated, is they will now stay in one place while being photographed. :)

And here's them doing their "down" command:


What good girls!

So maybe you're not as amazed as I am. In all truth, I was beginning to wonder if Bella could be trained. She seems to have a seriously short attention span. They told me she was definitely a challenge. But now, on command, they'll both sit, stay, down, come, get off people and couches with the command "off," and Hannah can even shake hands/paws! Susie, the owner of Atlanta Dog Trainer has even gotten Hannah to the point of being able to walk past other dogs without completely freaking out (barking, pulling, etc.) Plus, they worked on the barking issues, and they are both MUCH quieter since arriving home yesterday.

Of course, this is an ongoing process and we have daily work to do with these two to keep up their good behavior, as well as improve upon it. Needless to say, I'm quite pleased with the progress Susie & Stenelle made in only two weeks with our little weiner schnitzels.

Monday, July 10, 2006

A Dachshund Delightful surprise

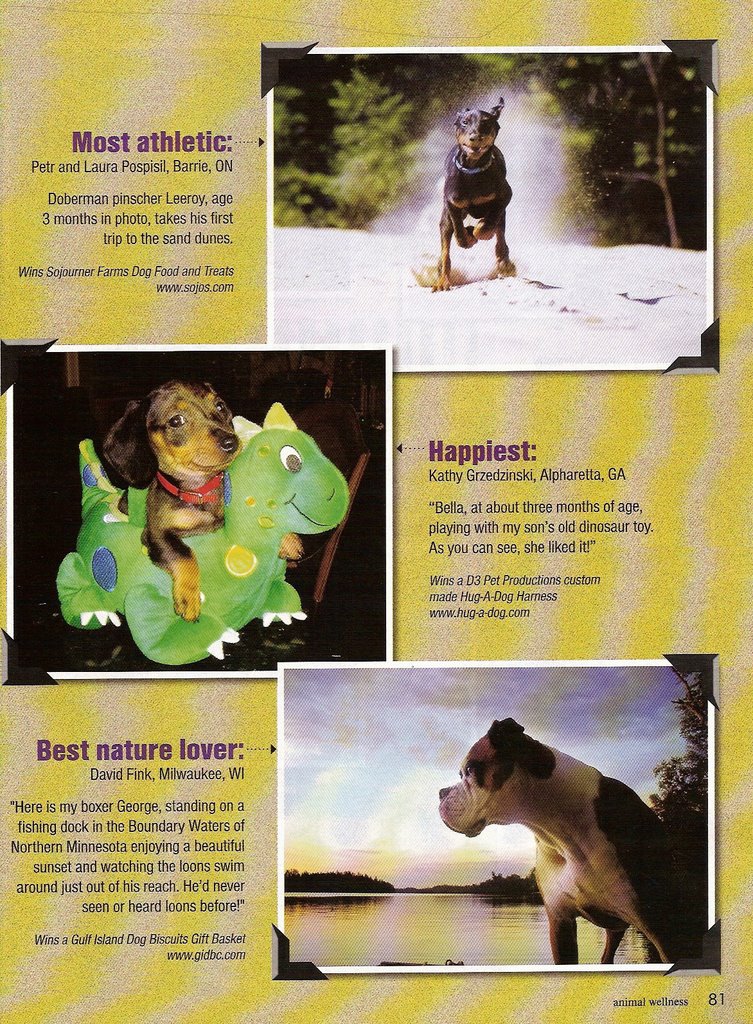
One day while stumbling around the internet I came upon a photo contest, so via the ease of digital emailing, I sent a photo of Bella as a puppy in my son's old dinosaur toy. Then I forgot all about it - until last week, that is, when I received a phone call that my photo had won in Animal Wellness magazine's photo contest for "happiest" dog and that I'd be receiving a prize soon. Woo Hoo! They were sweet enough to send me an advance copy (new issue comes out July 18th) so check her out in the green dinosaur.


A few days later a call came in from Dachshund Delights asking me for Bella's measurements for her special "harness" they were going to make for her. How much fun is this?


The new harness arrived today, so here's the weiner schnitzel wearing her newly won apparel:


This is the second photo contest I've ever won, so I still get overly excited about these types of things. Thanks for bearing with me! :)

Saturday, July 08, 2006

Summertime...and the livin' is easy

I was finally able to attend my Thursday night metalsmithing class after having missed the first three. Because I've been taking a little vacation from jewelry making, I felt a bit out of it and don't know what project I want to tackle next. HB gave a demonstration on granulation and there is a class starting on that subject this month, but making all those teensy little silver balls and fusing them onto metal seems like it would require concentration and focus... and I'm in summer mode. This must be the residue of feelings from that extraordinary trip I was was just fortunate enough to have been able to experience. So...I'll save granulation for something to look forward to learning in the future.

Meanwhile, the hubby and I are still on a cooking spree. We even went out yesterday and ordered a new grill!

The last night Jess was here (sniff, sniff), we made Moroccan Fish Skewers from a recipe in a book called "Grilling" by Louise Pickford. I found it at Crate and Barrel. The author added couscous, but I made a side of rice instead. Here's a photo:

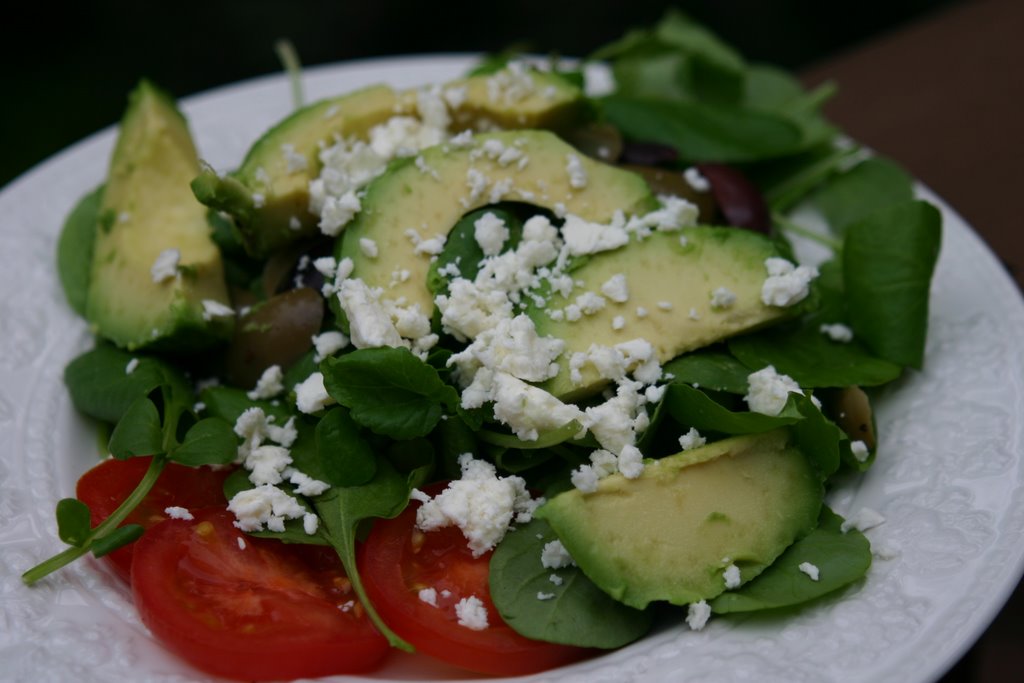
To this I added and a salad with simple greens, feta cheese and arugula...along with our homemade salad dressing (which happens to be the only one we use, for the most part). If I haven't already shared this recipe, here it is: It's 1/2 cup olive oil, 1/4 cup red wine vinegar, 1 tsp. salt, 1 tsp. black pepper, touch of sugar and 1 chopped garlic clove.


Moroccan Fish Skewers:

1 1/2 lb. swordfish steaks
extra virgin olive oil
24 large bay leaves, soaked in cold
water for 1 hour
2 lemons, cut into 24 chunks
lemon juice
1/2 recipe Moroccan Rub
8 wooden skewers, soaked in cold water for 1 hour.

Using sharp knife, cut swordfish into 32 cubes (I actually made larger cubes and made less that that). Put into a ceramic dish. Add a sprinkle of olive oil and the Moroccan Rub and toss until the fish is evenly coated. Marinate in refrigerator for 1 hour.

Preheat grill. Thread the fish, bay leaves and chunks of lemon onto the soaked skewers and cook over hot coals for 3 to 4 minutes, turning halfway through until cooked. Serve over couscous or rice. NOTE: One hour is sufficient to flavor the fish with the rub and any longer could cause the flavors to be overpowering.

Moroccan Rub:

1 tbls. coriander seeds
1 tsp. cumin seeds
2 cinnamon sticks (I used a teaspoon of cinnamon instead)
1 tsp. whole allspice berries
6 cloves
a pinch of saffron threads
1 tsp. ground turmeric
2 tsp. dried onion flakes
1 tsp. salt
1/2 tsp. paprika

Toast the whole spices and saffron threads in a dry skillet over medium heat for 2 minutes. Remove from heat and let cool. Transfer to a spice grinder (I used a mortar and pestle) and rush into a coarse powder. Mix up remaining spices and mix well (I continued to crush it all up with the mortar and pestle).

As you can see, this recipe takes a lot of preparation. I'd suggest making the Moroccan Rub earlier in the day.


Friday, June 23, 2006

Cruisin...

What a fantastic trip we had! From beginning to end, we had a blast! That's our balcony, where we would spend some time each evening as the ship left shore, heading for the next destination. We would order some wine and yummy nibbles from room service and sit on the balcony talking about how lucky we were to be there. Then we would change clothes and meet up for our nightly four-course dinner in one of the ship's restaurants. The food was excellent and the staff was friendly and very accomodating with my need for gluten free selections. This was my third cruise (and BEST!) but I've always found the staff very accomodating to my need for a gluten free diet. (And, just as a side here, Lufthansa airlines provided the most spectacular gluten free meals I've ever experienced on an airplane.)


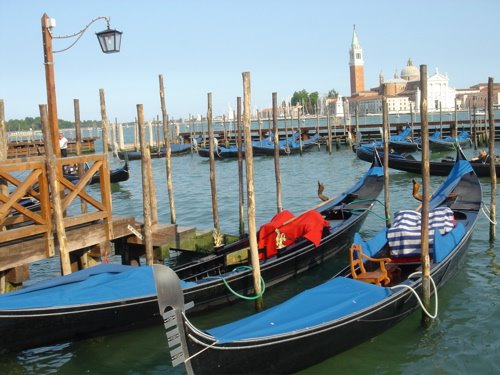
Venice, Italy. Everyone had told me I had to visit it at least once in my lifetime and they were right. It's the most unique place on the planet...over 100 small islands connected by bridges and something like 163 churches! Important art is everywhere you turn. We walked into a church and there was Titian's "The Assumption of the Virgin" hanging right before us! Amazing place.


Split, Croatia was tiny, but cute. We took a little tour and were told the people live so close together they not only know everything about everyone else's business, they even jump in and get involved when families argue. It's probably true.


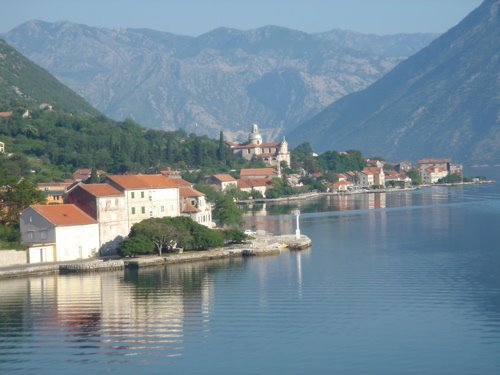
Montenegro. I'll never forget the morning I woke up and opened the curtains as we were pulling into port in this country I'd never even heard of. It was breathtakingly beautiful. It was still very early so the only sound was that of a rooster cock-a-doodle-dooing in the distance and an occasional scooter driving along the road that followed the edge of the sea. Montenegro made me think that this was probably what California used to look like a long time ago - before it got too built up. I loved it.


I had no idea what to expect in Turkey. We booked a tour to "Ephesus," second only to the Acropolis in ancient ruins and it was mind-boggling. This is where the Ephesians lived. These were the people St. Paul sent his letters to, which can be read in the bible. Cleopatra walked these streets and spent her honeymoon there. Absolutely amazing place.


Here's Brian & Connie, and they are the friends who made this trip as fun as it was! We toured together, ate together, danced together and laughed together each and every day. I am so grateful to have them in my life.


Santorini, Greece. It's everything I thought is was going to be. We sat in a cafe overlooking the sea having a bite to eat and were mesmerized by the beauty all around us.


Speaking of food, how's this for a Greek feast? Restaurants were everywhere in Athens and each one of them had a man standing out front trying to lure us in. Sometimes they succeeded, as was the case here. It was delicious.


So now I'm home and my clothes feel a bit snug around the middle, but I'm afraid to step onto the scale. I'll give myself a few more days before facing reality. No need to rush into these things. :)